ഒറിജിനൽ കൂവപ്പൊടി ഉണ്ടാക്കുന്ന സൂത്ര വിദ്യ ഇതാ.!! വെറും 3 സ്റ്റെപ്പ് മാത്രം മതി ശുദ്ധമായ കൂവപ്പൊടി ഇനി വീട്ടിൽ എളുപ്പത്തിൽ ഉണ്ടാക്കാം.!! Homemade Koovapodi making
Homemade Koovapodi making : ധാരാളം ഔഷധ ഗുണങ്ങളുള്ള ഒരു കിഴങ്ങാണ് കൂവ. പണ്ടുകാലം തൊട്ടുതന്നെ തിരുവാതിര ദിവസം കൂവ ഉപയോഗിച്ച് പായസം തയ്യാറാക്കുന്നത് നമ്മുടെ നാട്ടിൽ പതിവുള്ള കാര്യമാണ്. അതുകൂടാതെ ദഹന സംബന്ധമായ പ്രശ്നങ്ങളും മറ്റും ഉള്ളവർക്ക് കൂവ വെള്ളത്തിൽ കാച്ചി കുടിക്കുന്നതും നല്ല രീതിയിൽ ഗുണം ചെയ്യുന്ന കാര്യമാണ്. എന്നാൽ ഇന്ന് മിക്ക സ്ഥലങ്ങളിലും കൂവ കൃഷി ചെയ്യുന്നത് വളരെ കുറവാണ്.
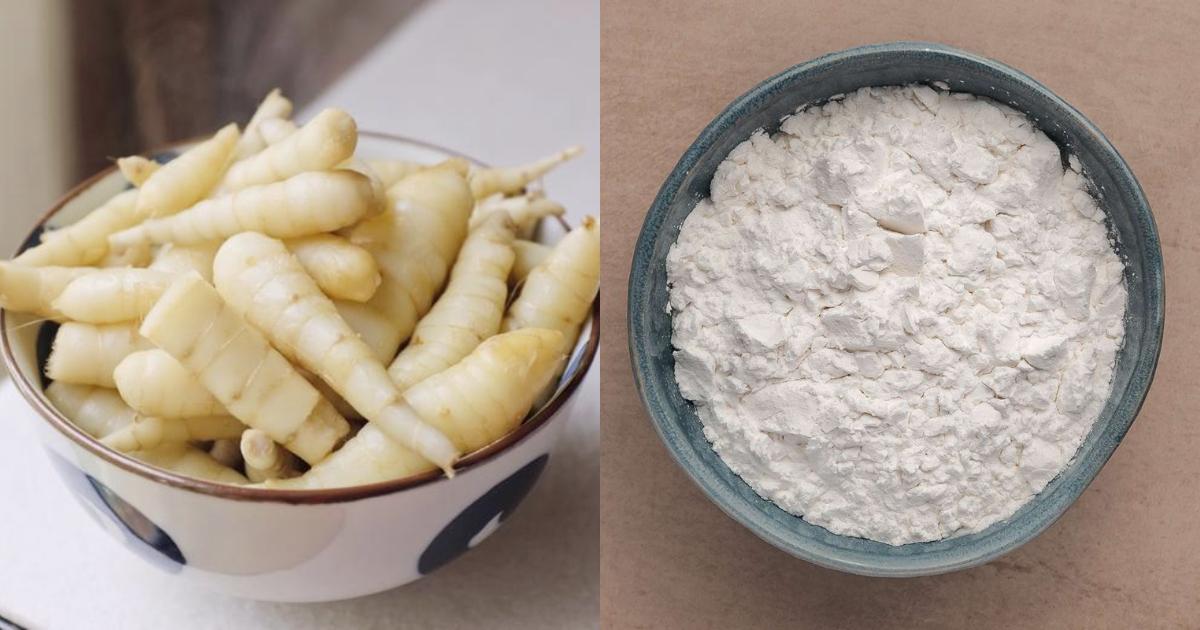
അതുകൊണ്ടു തന്നെ എല്ലാവരും കടകളിൽ നിന്നും കൂവ പൊടി വാങ്ങി ഉപയോഗിക്കുന്ന പതിവായിരിക്കും ഉള്ളത്. വളരെ എളുപ്പത്തിൽ കൃഷി ചെയ്ത് എടുക്കാവുന്ന കൂവ ഉപയോഗിച്ച് വീട്ടിൽ തന്നെ ആവശ്യമുള്ള പൊടി തയ്യാറാക്കി എടുക്കാവുന്നതാണ്. അതിനായി കൂവ മണ്ണിൽ നിന്നും പൂർണ്ണമായും കിളച്ച് എടുക്കുക. അതിനുശേഷം കൂവയുടെ തോലെല്ലാം കളഞ്ഞ് വൃത്തിയാക്കി രണ്ടോ മൂന്നോ തവണ വെള്ളത്തിൽ കഴുകിയെടുക്കണം.
കൂവയുടെ പുറത്തെ മണ്ണെല്ലാം പോയിട്ടുണ്ടോ എന്നകാര്യം ഉറപ്പ് വരുത്തുക. കൂവ ചെറിയ കഷണങ്ങളായി വട്ടത്തിൽ അരിഞ്ഞെടുത്ത് മാറ്റി വയ്ക്കുക. അതിനുശേഷം മിക്സിയുടെ ജാറിലേക്ക് ഇട്ട് കുറച്ച് വെള്ളവും ഒഴിച്ച് പേസ്റ്റ് രൂപത്തിൽ അരച്ചെടുക്കുക. ഇത്തരത്തിൽ അരച്ചെടുക്കുന്ന കൂവയുടെ പേസ്റ്റിൽ നിന്നും അതിന്റെ കട്ട് മുഴുവനായും കളയേണ്ടതുണ്ട്. അതിനായി ഏകദേശം നാല് ലിറ്റർ അളവിൽ വെള്ളം കൂവയിലേക്ക് ഒഴിച്ചു കൊടുക്കുക. അതിൽ നിന്നും രണ്ടോ മൂന്നോ തവണയായി കട്ട് അരിച്ചെടുത്ത് മാറ്റുക.
ഇത്തരത്തിൽ അരിച്ചെടുത്ത മാറ്റിവയ്ക്കുന്ന വെള്ളമെല്ലാം കുറഞ്ഞത് 4 മണിക്കൂറെങ്കിലും റസ്റ്റ് ചെയ്യാനായി വെക്കണം. അതിനുശേഷം അതിൽ നിന്നും താഴെ ഊറി വരുന്ന പൊടിയെടുത്ത് അത് ഒരു തോർത്തിലോ മറ്റോ വിതറി കൊടുക്കുക. ഇത് സൂര്യ പ്രകാശത്തിൽ വച്ച് നല്ലതുപോലെ ഉണക്കിയെടുക്കണം. ഒരു കാരണവശാലും കൂവ ഉണക്കാനായി പേപ്പർ ഉപയോഗിക്കരുത്. നല്ല രീതിയിൽ ഉണങ്ങി കിട്ടിയ കൂവപ്പൊടി എയർ ടൈറ്റ് ആയ ഒരു കണ്ടെയ്നറിൽ സൂക്ഷിക്കുകയാണെങ്കിൽ ആവശ്യാനുസരണം എടുത്ത് ഉപയോഗപ്പെടുത്താവുന്നതാണ്. കൂടുതൽ വിശദമായി മനസ്സിലാക്കാൻ വീഡിയോ കാണാവുന്നതാണ്. Homemade Koovapodi making Video Credit : Mini’s LifeStyle
Homemade Koovapodi making
- Cleaning:
Start by peeling and washing the arrowroot tubers thoroughly to remove dirt and impurities. Trim off black spots and bad parts. - Chopping and Grinding:
Cut the tubers into small pieces for easy grinding. Grind them in batches, adding water gradually to form a slurry. - Filtering:
Pour the slurry through a fine muslin cloth or strainer into a large container, separating the fibrous pulp from the starch water. - Settling:
Let the starch water sit undisturbed for 2-3 hours until the white starch settles at the bottom, with clear water on top. - Washing/Starch Separation:
Gently pour out the clear water layer, leaving the thick starch behind. Refill the container with fresh water, stir, and repeat the settling and draining process multiple times until the water runs clear. - Drying:
Spread the thick starch paste evenly on a clean tray or cloth and sun-dry for 1-2 days until completely dry with no moisture. - Final Grinding:
Once dried, break it into small pieces and grind it into a fine powder. Sift and store it in an airtight container.
Uses:
Homemade arrowroot powder is used in porridges, puddings, and as a thickening agent in cooking. It also has skin and health benefits.
This traditional method preserves purity and quality, making fresh, natural arrowroot powder that enhances recipes and wellness.
പയർ മെഴുക്കുവരട്ടി.! കിടിലൻ രുചിയിൽ ഇങ്ങനെ ഒന്നു തയ്യാറാക്കി നോക്കു; പാത്രം കാലിയാകുന്നതറിയില്ല.!!